 |
 |
 |
|
|
|
practical and lateralI offer to teach what I do and how I deal with new problems. I cover a fairly wide range of jewellery-making processes applying lateral-thinking to tool and equipment use. It's an approach to materials and processes that tends towards the lo-tech and soft-tech, with a good dose of precision on occasion, and always with a strong thread of humour and fun.My teaching is based on a variety of subject areas, primarily oriented to materials and processes which I'll try to list on this page, but I teach with a readiness to ad-lib, reconstruct or invent. It's a firm belief of mine that we can be more usefully creative once we have some understanding of the ways and things we manipulate. I break my own rules sometimes when I'm experimenting; but I believe I can when the creativity is based at least on some basic practical understanding. A word about jewellery teaching worldwide: skills have been slowly dismantled or watered down from the curriculum. People refer to a de-skilling happening. There is a concern that the basic skills - techniques and processes, an understanding of materials - were being eroded in order to give preference to 'idea' and conceptual creativity. An inquisitiveness of and creativity in processes and materials seems not to be encouraged. The impetus has been coming from those who want jewellery to become a fine art and lose the trappings of a fine craft, and of course the trend is supported by the schools' budgeting administration. Jewellery has a fascination for people, and it's related to something tangible. I love teaching people, from children to professionals, using the simplest of tools, and watching them get real enjoyment from feeling some physical understanding of jewellery work and making new things.
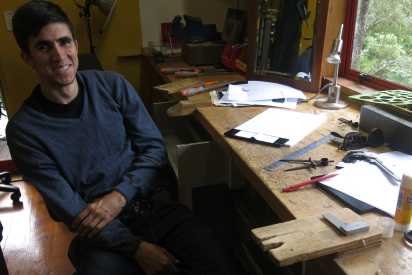
Brian Adam noshade> the studioBush Jewellery studio is in a beautiful part of Titirangi 20 minutes from Auckland city, and surrounded by kowhai, kanuka bush, mamaku tree ferns, cabbage trees, and mixed border NZ bush Waitakere City Reserve land. It's a unique studio setting, hence the title 'Bush Jewellery'. It's quiet and invigorating. Titirangi library is just up the road and the shopping centre with several cafes is a little further within a 4 minute walk. The studio itself is a stand-alone Julie Stout building just at the back of our residence, a delightful colourful space with big windows looking out over the bush, and we've recently renovated with new fittings and benchspaces for six, so we are equipped for a variety of both standard and alternative contemporary jewellery activities. Ruth and I work here fulltime making our different lines of jewellery, and we have a bench-hand, usually a jewellery graduate, work for us here 2 days a week. I teach private students here at a regular time that suits them, a Saturday morning class according to demand, and once upon a time I would travel overseas for a month in June, July or August to take part in summer school teaching programs at universities and jewellery/metals guilds in Australia, USA, or Canada.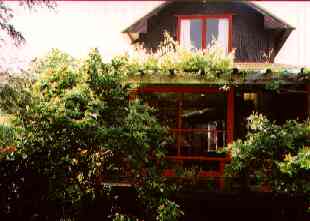
|
custom tuitionBEING UPDATED January 2016Casual Tuition on a custom timetable. Jewellery tuition, practical tips and professional tricks at all levels. At the end of any course you'll come away with some or several finished pieces. Good for people starting out, or if you just need some help to do something you're keen on. You'll get to negotiate with me what tuition we cover, we plan the steps you might need, consider alternatives, do demonstrations and try out any unplanned curiosities. You will get time at the jewellery bench to practise and develop your new skill-set, and along the way we'll evaluate if the fancy plan is actually working for you.
Master-classes and professional students. This would also be a good time if you want some help with a project you've already started, or want in-depth study on practical aspects of jewellery-making to upgrade your existing skills, especially if you've just graduated and are wondering how to apply yourself to a new profession. You get to direct what stuff you do here. Your timetable of session days can be grouped together as an intensive, or spread over several weeks.
feesPrivate Sessions, Courses and Intensives$TBA - a 1-hour session - a 2-hour session - a course of 8 x 2-hour sessions - one day intensive - one week intensive (five consecutive days) GROUP CLASSES - prices for 3 people $TBA - a 2-hour silver ringmaking session - a course of 8 x 2-hour sessions - one day intensive - one week intensive (five consecutive days) Introductory offer for new students - $70. A time to check me out and to see if you like the studio. Talk about what you want to do, and maybe to make a start on your project. Or make a quick piece of jewellery. Allow 1 hour.
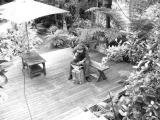
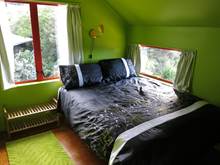
The room above the studio
 Sunny treetop room in TitirangiAuckland, Auckland, New Zealand Self-contained small room for two adults which gets sun from sunrise to late afternoon. Enjoy the birdsong from your room, use the shared decks, incl a small BBQ. Wifi 60Mbps. Insect screens all wi...Holiday Rentals in Auckland
|
modules* the finger ring
|
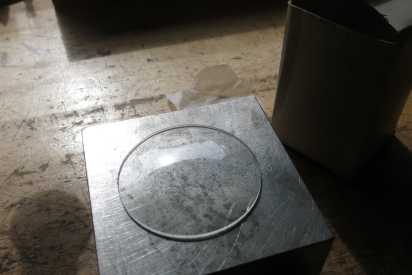
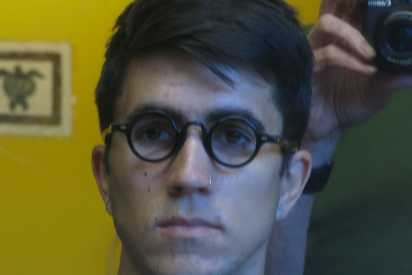
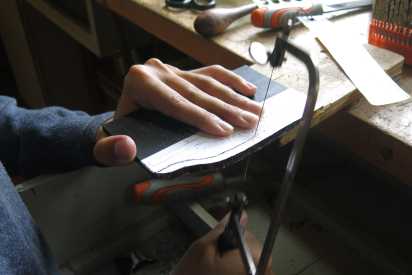
module infoRing making 1 - Finger ring.Hammered, forged, textured, stamped designs or added element. This might seem a simple beginning exercise but it introduces you to one of many unique methods devised by me that use traditional tools in a new way and that uses specially created tools for speed/efficiency. Measuring finger sizes accurately. Lo-tech tool for rounding strip into ring. Soldering 1 - Plain plumbers flux, and simple solder placement. Joint preparation. Saw the joint to eliminate the gap and clean it up in one process. Checking before soldering. Brazing (or hard soldering) is brought up to date with some modern and worldwide-common flux technology and heat control tricks. Soldering 2 - Tiny onto big, heat control problem-solving. Making good joints that are so required for stud earrings, brooch backs, and other places where a small part is soldered onto a bigger part. It's a classic soldering situation that need special attention, because the little part is often overheated before the big part is warm enough. Or the solder balls up and changes its melting point. Soldering 3 - Sweat joins, lamination, using the solder probe. Laminate metal shapes together, such as a design onto a backing. Apply solder bits with the pick, sqidging the solder back into place if it runs away from the joint. Double soldering is one of the safest ways to ensure the pieces laminate well. Soldering 4 - Stick method. Apply solder and flux together in this free style, using precise amounts right on the join, or tacking parts together. If breaking the rule about gap-filling interests you, this method is for you. Also apply ('paint') solder onto a contrasting metal to make decorative marks. Soldering 5 - Binding Wire. This is a superior way to prepare a joint when it really needs secure holding. Especially useful on complicated pieces. Over many years building hundreds of spectacle frames I have devised a way to make binding easier and more efficient. Tips on using iron or titanium wire. Ring making 2 - Setting a stone Make a finger ring with a round cabochon cut set using one of 4 rub-over bezel methods, varying in construction from simple to elegant. Sometimes the simple ways have inherent problems that crop up later. Other times an apparently fancy method is actually simpler because it involves less risk. Make all four methods. This is fabrication at its most useful, where colourful and interesting gemstones are set in a simple and secure setting. Material choice (gold on silver?) and fabrication style (freedom or accuracy?) are some of the things you get to think about. Setting - Organic shapes. Set an irregular-shaped shell or stone shape in a precious metal backing. Protect a natural material with a rub-over bezel that doesn't use soldered joins. Connect the set piece using a cold-joining method to make a pendant or similar. Materials - Titanium (Ti). Working with and colouring the most popular of the reactive metals. This metal suits - in fact requires - cold-joining techniques. Rivets, screws, nuts and bolts, tabs, jumprings, etc. Forging titanium is a little-known but useful process. Also try its sister metal niobium (Nb), anodising it for brighter colours. Discuss how to make your own anodiser for Ti and Nb. Prior notice is required to bring in supplies. Lo-tech Casting 1 - Sand and stovetops. This is a simple and effective way to make duplicates of a made or found object in a durable metal. Molds can be prepared in minutes and objects cast in pewter using a pan on a camping (Colmans?) stove. The sand casting method is also very useful for silver and gold one-off castings. Lo-tech Casting 2 - Cuttlefish. This is another simple and effective way to cast. Molds can be prepared in minutes, and objects cast in pewter, then the same mold used for a bronze or silver casting. Lo-tech Casting 3 - Forging a ring. Cast a ring-blank in pure silver or 24k gold and forge a one-piece ring. Lo-tech Casting 4 - casting a complicated shape. Sand casting is especially suitable for flat or raised relief shapes and designs. However it's also possible to cast a more 3D shape with careful shaping of the mold. Casting - Model-making. Carve a shape from hard jewellers wax and cast it in cuttlefish, sand or investment as a series of components for rings, bracelets, necklets, etc. Sand and cuttlefish methods allow you to re-use the model over and over, however the investment method burns out the wax ('lost wax'). Investment Casting - sling and potatoes. Careful and successful measuring and timing this most accurate of molds. Prepare molds for various methods of casting: centrifugal, sling, and steam. Use both the lo-tech and fast flower-pot burnout, and (available soon) the standard kiln burnout. Melting and pouring. Consider a variety of alloys, choose from those that are most suitable for casting, and understand why they are. Casting - The sling casting machine is a reliable way to centrifuge molten metal into the mold. It's clamped to the benchtop and hand-rotated, spinning silently for a minute or two. Steam casting requires a slightly different investment mold design, and is easily performed with wet paper, a potato or an apple. Whatever you like the scent of. Also: dealing with a casting company, preparing models for sending off to a local casting house. Cold joins in general - Riveting. Cold-joining techniques range from simple to stylish and ones that are incorporated into the overall design. Some come to us from industry (pop rivets) and others come to us from other craft areas (sewing, tabs). Make up a sample board that demonstrates a series of different types of rivet: plain, headed, invisible, tube, swivel, decorative. Finishing. Lo-tech polishing, hand burnishing, matt surfaces, machine tumbling, motor buffing. Vibrating tumbling allows you to pass on that mucky polishing job. It also allows you to easily clean and texturise your pieces and to polish it up in all the details while you relax, or carry on working. Colouring - Sulphuring silver, sterling and copper. Make incised, stamped, carved, textured designs stand out in black on a matt or shiny surface, using a simple pre-mixed product often available through local garden centres. Fold Forming. This is a technique devised by Charles Llewton-Brain for getting sheet metal to quickly resemble 3D shapes. The shapes are very like natural forms and the fold provides strength to thin metal. The tools are very simple: fingers, hands, hammers, mallets, a steel anvil. No soldering is necessary, but some heating is needed for annealing. Note the annealing characteristics for each metal: aluminium and pure silver anneals at about 350C (no colour change), sterling silver and gold alloys anneal at about 650C (dull blackish-red), while copper anneals at 750C (red hot). Steel Toolmaking. If you know how to harden and temper steel you'll be able to make tools perfectly matched for the job in hand. A large part of the value of a handmade tool is its uniqueness; if your tools don't look like anyone else's your jewellery is likely to be unique as well. Make a tool steel punch with a polished, hardened and straw-tempered working tip. Finish the rest of the tool to be free of sharp edges; with optional identification or decorative features. Gold, silver and copper alloy theory. Sterling silver, silver/copper alloys, karat golds, and bronze can be made in the small studio, allowing designs from components of a variety of metal colours and inherent qualities. Learn more about karat golds and what makes the colours. Discover some Japanese alloys. Practical alloying - Silver. Make your simple sand casting with any of the alloys of silver and copper: from 999Ag (pure silver) to 10Ag/90Cu. All the alloys are useful in some way, offering softness and whiteness (high silver alloys), degrees of toughness (sterling, coin silver), a useful hi-temp solder (the eutectic), springiness (around 50/50 alloys), degrees of pink and red (med to high copper alloys), and a red bronze using silver instead of tin. Practical alloying - Copper. Make your bronze from scrap copper wire and pure tin. Recognise the various brass alloys and make castings from carefully chosen scrap metal. Practical alloying - Gold. Make any of the red gold alloys from 22k down. All the alloys of gold and copper are useful in some way, offering a great range of subtle colours and characteristics, yet only a few are designated karat ratings. Restrain yourself to the standard karat alloys or break out into the others. Mix yourself a small amount of a red gold of any karat for a selection of gold components to add to your designs at a later stage. Calculating in a practical way how to increase/decrease karat. Shakudo is a Japanese alloy of gold and copper, the amount of gold is small (4 - 20%) yet the colouring possibilities are great (depletion gilding, chemical patination, torch colouring and blackening). Eyeglasses - Spectacle frames. On this workshop we'll cover the techniques for designing and constructing eyewear and other sight-specific work, from simple functional eyeglasses to absurd visual statements. It's an exciting area of body adornment. How simple or how complicated is something for you to consider. My aim is to facilitate your investigation. My emphasis is on designing something functional and comfortable for yourself or for one of your regular jewellery customers. I'd encourage you to incorporate your own jewellery ideas, processes and materials. Covers: historical and contemporary eyewear slideshow. Useful face and frame measurements, frame-making, designing for lenses, eyewire channel. Lens edging, shaping, cutting, drilling, dyeing, monofilament nylon. Optical parts suppliers. 2D CAD drawing for cutting accuracy and useful customer records. Soldering parts in place, threaded holes in metal, plastic and lenses. Also: working with acetate frame material, sawing, heat-forming, shaping, and embellishing existing frames. eyeglass intensiveThis acetate frame was made by a student from USA and made in a very fast and intensive workshop, a series of days at Bush Jewellery. He was accommodated in our self-contained room above the studio.The material used was Mazzucchelli cellulose acetate sheet, black and tortoise, and we used hand technology to saw, shape, heat-form, fit CR39 plano lenses and rivet on hinges.
Danger - Artists at Work Reduction of studio hazards, personal prevention and protection, materials, chemicals, gloves, goggles, masks, extraction versus fans. Setting up a workshop. Advice on setting up a studio workshop for yourself. Simple tool and equipment list, and a local suppliers list, for starting a jewellery business with a studio workshop. |
|
Brian Adam |
www.adam.co.nz/workshops/subjects.htm |


-412px.jpg)
-412px.jpg)
-412px.jpg)
-412px.jpg)
-412px.jpg)
-412px.jpg)
-412px.jpg)
-412px.jpg)
-412px.jpg)